Showing posts with label DIY. Show all posts

May 4, 2014

Macrame bracelet tutorial

A while ago I made this bracelet. And as promised I finally made a little tutorial for the macrame pattern.

You need an even number of colors, 2 threads each. I used the colors white, yellow, light blue and mint.
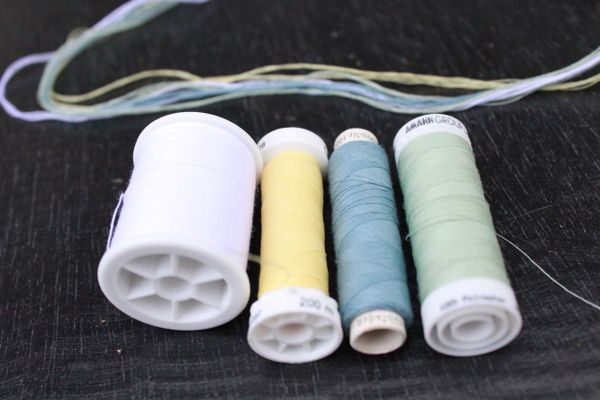


I sorted the color in this order: white (2x), light blue (2x), mint (2x) and yellow (2x). This results into yellow-light blue and white-mint rows. Keep that in mind when deciding the order!

You only need two sorts of knots (I unfortunatelly don't know the actual names of the knots):
- 2 right knots in sequence with the same threads...
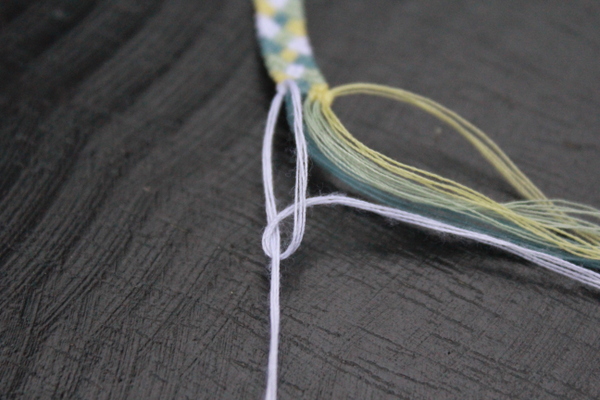


...make this final "right double knot".
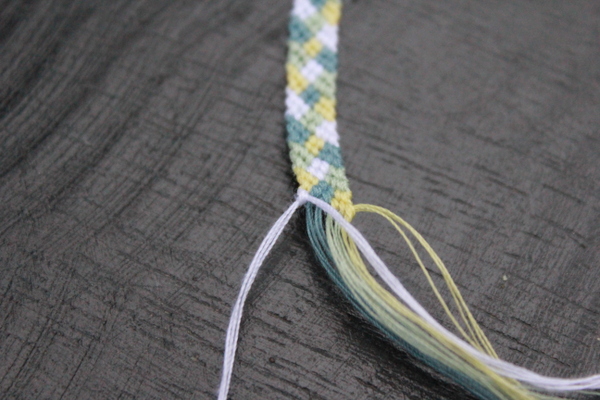


- 2 left knots in sequence with the same threads...
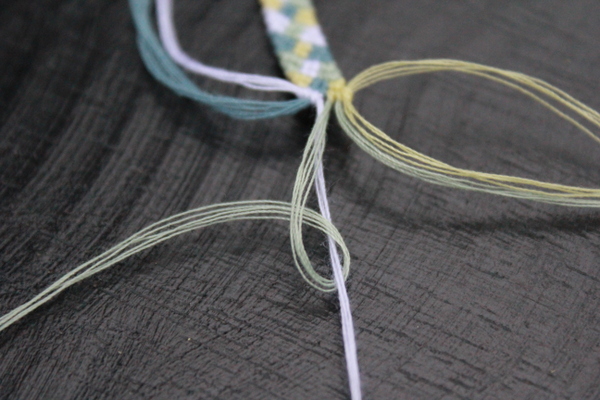


...make this final "left double knot".
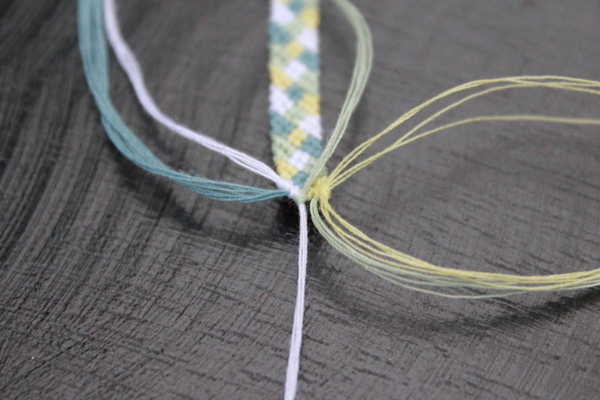


So, the bracelet pattern works like this:

1. row: Make 3 right double knots with the first color (white) showing.
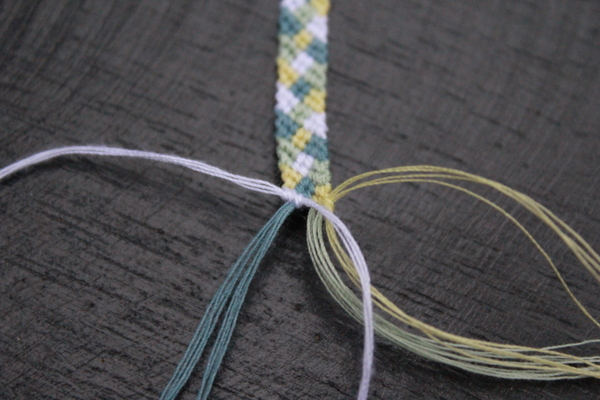


Make two left double knots with the 3rd color (mint) showing.
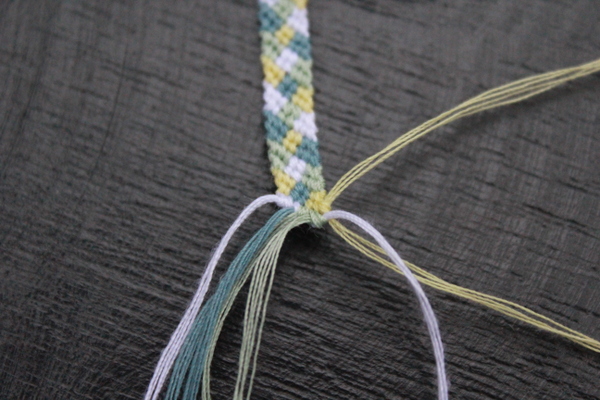


Make 2 right double knots with the first color (white) showing.

So this is the final row:
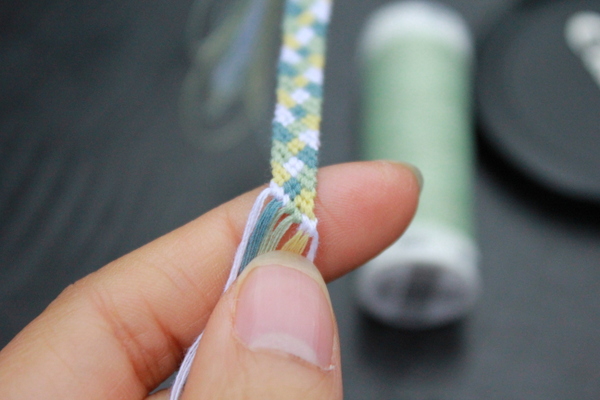


2. row: Make 2 right double knots with the first color (white) showing. Make two left double knots with the 3rd color (mint) showing. Make 3 right double knots with the first color (white) showing.

Repeat this pattern until the bracelet is as long as you like.
Just add as many colors as you want, but it should be an even number of colors, if its uneven the same color will be side by side.


Pretty easy, right? :D
Wish you all a wonderful week! ♥

Apr 25, 2014

April We ♥ Mail - Easter swap

Due to unfortunate changes in our project, I had to send out the April snail mail later as planned and to another person than originally decided. So my April mail with the theme "easter" - not a surprise - was sent to Sharon living in UK. :)

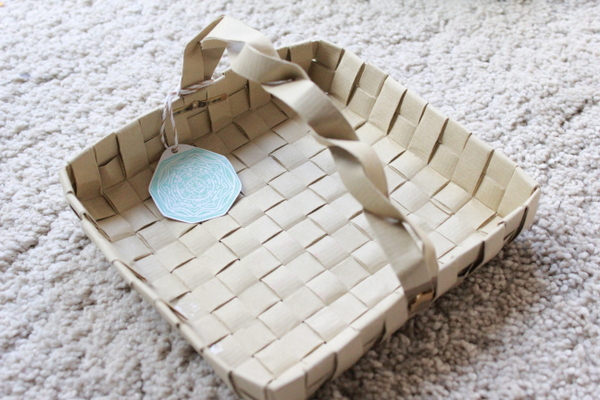
I decided to weave an easter basket to hold all the little things I've prepared with brown craft paper. I made the basket flat and the handle movable, so it would fit into a parcel. :)


Again I carved a theme-related stamp: An easter egg I've already shown you on my journal page. I used it for cards and tags.


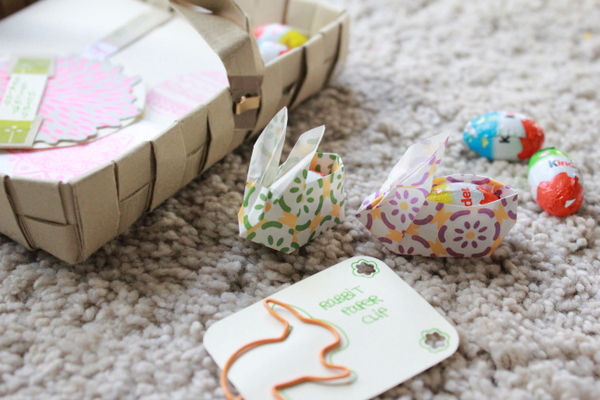
To fold some origami bunnies, I picked this lovely video tutorial to make super cute bunny bags. Perfect to hold tasty treats! :)


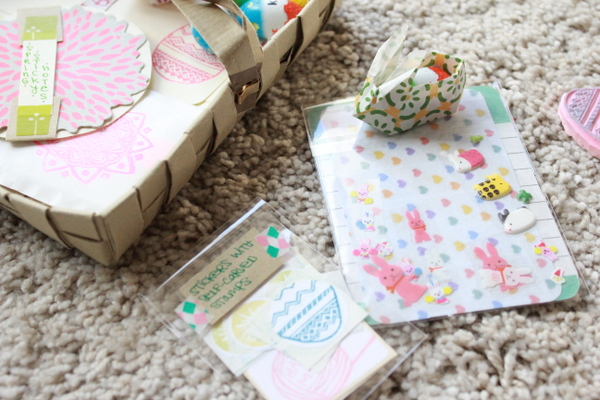
I always like to add stickers embellished with self-carved stamps, as well as some journaling cards and bunny stickers. :)


A little easter cookie recipe for Sharon to bake her own tasty treats and some crocheted egg ornaments.


Even it's a little belated, I still hope you'll enjoy the mail, Sharon! :)

---

I also received my April mail from Kim from the Netherlands.
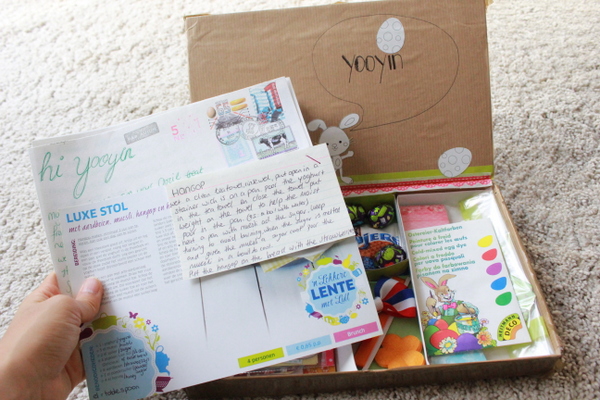
She's sent me such a cute package! I loved the decoration of the parcel so much! :D

A cute letter, a Dutch recipe...


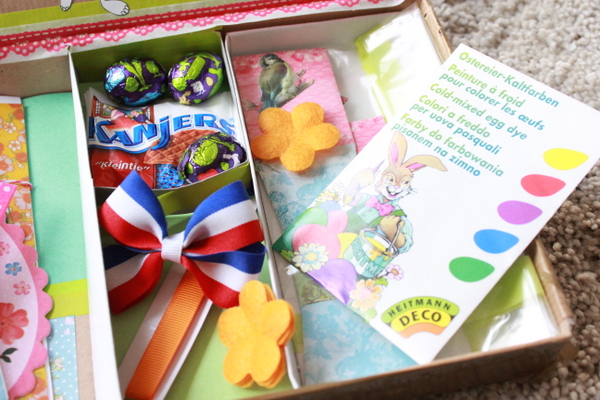
...tasty sweets, ribbons in the typical Dutch colors, ink for dyeing eggs...


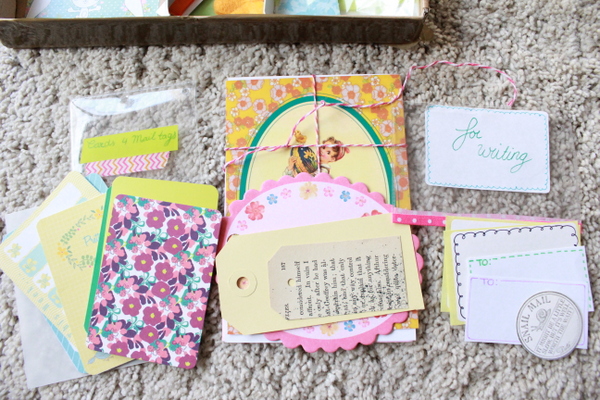
...and beautiful stationary: A card, pretty journaling cards, lovely tags and cute selfmade stickers for snail mailing!


Thank you, Kim! ♥ I enjoyed opening and exploring your cute snail mail so much! :)

Jan 26, 2014

Stationery folding technique

Like last week I would like to end this week's theme with a little DIY, a simple letter folding techniques I know from my childhood. :)

As I had some troubles explaining the steps in words, I tried a different approach this time. ;) I hope the pictures now speak for themselves. :)

If you have more than one sheet, you can stack them and fold altogether.


Really simple but still a nice way to fold up your letter.
Wish you all a lovely start into the week and have fun folding! :)

Jan 19, 2014

Envelope folding technique

I would like to end this week's theme with a little DIY. I've found this envelope folding technique years ago in one book I borrowed from the library. And since then I like to use it sometimes to create a fun envelope. :)

All you need is paper and your hands. :)


Fold the paper horizontally, but only at the ends, otherwise you will get not a nice crease in the middle of the front of your envelope.


Fold the corners aligning the middle crease.


Fold the lower and upper part aligning the middle crease.


Fold the left and right part aligning the lower and upper end of the envelope


Put the corners inside.


You're done! :)


Now you can embellish the envelope as you like.


I hope you like this little DIY. Even though my explanations are poor, I hope you get the DIY by looking at the pictures. ;)

Dec 3, 2012

Ending a loop scarf - tutorial

I finally finished my loop scarf. :)

I've already told you in the last post about the ending, but today I would like to give you a detailed description of step 5 with images. Hopefully it helps you to finish your loop scarf. :)

After carefully ripping the first row (those stitches you've casted on with a separate yarn in the beginning of the scarf) and slipping the stitches back to a needle, you get two open ends. The upper stitches in the picture are those, which you get after ripping the first row:


Holding both needles pointing to the right, start binding-off the stitches. For this, always knit the first stitches of both left needles (I'll just call them double-stitches) together:


Next, pass the first (right) stitch over the second (left) stitch on the working needle. (In the beginning you have to bind-off a double-stitch two times, so you get two stitches on the working needle. After this, you are able to do this step.)


If you continue like this, binding-off a double-stitch and slipping the first stitch over the second stitch on the working needle, the resulting scarf looks like this, a clear nice seam:


I hope this tutorial makes the process of finishing a scarf clearer to you. If you still have a question, please let me know! :)

Nov 22, 2012

Loop scarf tutorial

Last Tuesday I gave a little knitting basic class for two friends. :) We decided that our first knitting project would be a loop scarf.


We started with a swatch, because we all used different kinds of wool. I also made my students knit some patterns to decide which one they want to include in the final scarf. Unfortunately I only took pictures of their work at the beginning without the pattern.


I always thought knitting was very easy. But when I started to explain what to do, I realized it was harder than I thought. ;) But finally everyone managed to purl and knit. :D
Now everyone of us is knitting the scarf at home. And every time my students make a mistake or have a question I look over their work and try to help them. :)

This is the loop scarf I am making:


I used the so called brioche stitch ("Patentmuster" in German). It's very simple, yet I like the outcome.


I decided to make a little tutorial if someone is interested in knitting an easy loop scarf for this winter or as a christmas present. :) So here it goes:

1. Cast on as many stitches as you like. I casted on 34 stitches so the final width of the scarf is about 20 cm (7.8 inches). When casting on, use a separate piece of yarn. At the end of the tutorial I'll tell you why. :)

2. Work the first row as follows:
Knit, *knit, purl*, repat from * to * until one stitch is left, purl the last stitch.

3. Now work the pattern, which is the same for every row:
Knit (selvedge stitch), *knit, slip a stitch purlwise (with yarn in front)*, repeat from * to * until one stitch is left, slip stitch purlwise (selvedge stitch).

This is how to hold the needle when slip stitching purlwise. Don't purl the stitch, just slip it like this on the needle. You'll get two strings of yarn on the right needle.


In the first row of the pattern you have to knit just one string of yarn. Beginning from the second row you have to knit two strings of yarn (the ones you got from slip stitching in the previous row).

I wanted the border to come out nicely, so I decided to make a slip stitch edge. You only have to knit the first selvedge stitch and slip stitch the last stitch purlwise.

The border then looks like this:


4. Knit the scarf as long as you like. I'm going to use all 5 balls of wool I bought. I want the scarf to be around 140 cm long (about 55 inches).

5. For connecting the two ends, the casting on with a separate piece of yarn comes in handy. :) Carefully rip the first row (the stitches you've casted on at the beginning) while slipping the resulting stitches back on a separate needle. Now you have two open ends, you just have to bind off together. :)
For a basic knit bind-off hold the two endings next to each other (without any twists in the scarf), so that both of the two needles are oriented to the right. With a third needle *knit the first two stitches of each needle together. Do the same with the second two stitches. Pass the first stitch over the second stitch.* Repeat from * to *.

As I'm in the middle of my scarf I haven't tried out the ending yet, but if you have a question or a problem with it just ask me. :) I would love to help you!

I hope you like this little tutorial, my first one. :) As soon as I'm done with my scarf I'll show it to you. :)